Showing posts with label faber castell. Show all posts

Saturday, September 6, 2014

Unique Sunrise


I was at my grandma's house the other week and was struck with a simple creative idea. After messing around a bit, this came into being. It's nothing fancy at all, but the sun is full of hot fire, plasma, and other goodies that I just thought it'd be cool representing that to an abstract degree.

Besides, perhaps if we were to look past the pure brightness of the sun, it'd be cool if we could witness something like this.

Title: Sunrise
Medium: FC Polychromos
Paper: 6x9 on Strathmore black Artagain

Tuesday, August 5, 2014

Of Unicorns and Lilies


 Today's post is dedicated to all things pure and hopeful. I've been imagining a unicorn walking through a forest full of Canada lilies, so I thought I should put that to paper. And also that I've been meaning to put a nice header on my blog and thought this piece would be great for it.

This artwork is also my first time using odorless mineral spirits (OMS) with colored pencils. 


 My goal was to keep the background blurry, but still give the feeling that the unicorn was walking through a forest.


 Here, you'll notice that the right side is a bit more darker than the left. That is the OMS at work. I used a paint brush to paint over the work I've done. It does a pretty good job removing the 'scratchy' look of colored pencils. It makes a pretty good blender.


Background is done and I've started working on the shadows and cast shadows of the unicorn.

I added a very light green (Earh Green) on the unicorn in random patterns to represent the shadows of the leaves of trees high above.

Here is the finished piece!

A close up.

Title: Keeper of the Forest
Medium: Faber-Castell Polychromos colored pencils
Size: on 9x12 Strathmore Drawing paper


Monday, June 30, 2014

The Mighty Sphinx


The Sphinx was powerful and wise creature of mythology. Unlike it's Greek cousin, which would eat travelers who would incorrectly answer its riddle, the Egyptian Sphinx was often portrayed as a guardian of the tomb of the pharaohs. It was less malevolent, though equally as dangerous. 

The Great Sphinx of Giza often comes to mind when people hear the word 'sphinx'. 

This is just a simple picture I made. I wanted to make a stylized version of an Egyptian Sphinx. The wings are not really common with the ones in Egypt, they're rather Greek, but it felt a little naked in the back area. Perhaps this one got tired of riddles?

Title: Egyptian Sphinx
Paper: 5"x7" Stonehenge
Medium: Faber Castell Polychromos

Monday, June 16, 2014

Mermaid Lake


Salutations. I've been working on this piece for a bit. To be honest, I had the line art for this in my sketchbook for a little over a year, and I decided I should do something with it. Better late than never, right? I've decided I wanted to try a new approach with markers. If you noticed, there are no inked lines in this drawing. My goal was to try to achieve a painterly-like affect with this piece (or at least get defining edges on certain parts of it without the use of line art). I think I did a pretty good job, for the most part. 

I'm still camera-less, but I did make sure to take a few pictures along the way on my phone. I've always like seeing progress shots of other peoples artworks. It's so interesting to see how things started out before it reached the finished look. I hope you guys have enjoyed seeing those of mine too throughout this blog.

This is the prep stage. The drafting tape is used to keep the border clean and crisp. I've traced the line work very lightly on nicer paper.


Once the tree is all colored in I started work on the grass. My goal throughout this piece is to try to give it and autumn(y) look. That's why you see a light orange color under the green(the color is YR01 Peach Puff to be precise). I've used that as a base color a lot through this piece, to try to keep colors uniform. 
 
 Grass is done. The grass by itself took a little over an hour to complete. Since this is the foreground, I wanted it to have more details.


The trees in the background are complete. I am kinda fond of that evergreen there. I started blocking in the shadow parts of the mermaid.

I started work on the mermaid. I didn't want her tail to be the same green as the rest of picture (it would have blended in too much), so I made it a soft teal. Once again I put a base coat of the YR01 under the teal, so that way she is not standing out obnoxiously. 

The water was the last thing to add. I was procrastinating with the water. I wanted to see how everything looked with the background before creating the lake. I haven't done a lot of water pictures so I was a bit worried how it might turn out. Overall, I'm pretty happy.

I added the finishing details with colored pencils. Now the mermaid has eyes and doesn't look creepy! Yay!

Overall,  am extremely happy how this turned out. I just wished the picture and scan came out better. It's more rich then what it shows on the screen.

Well, the next thing on my schedule (Schedule? What schedule?) should be a simple sphinx that I'm working on. It should be up within a few days. Till then, keep an eye out. 

Title: Mermaid Lake
Paper: 9x12 Strathmore Smooth Bristol
Medium(s): Copic marker, Faber Castell Polychromos colored pencils

Monday, March 10, 2014

Veiled


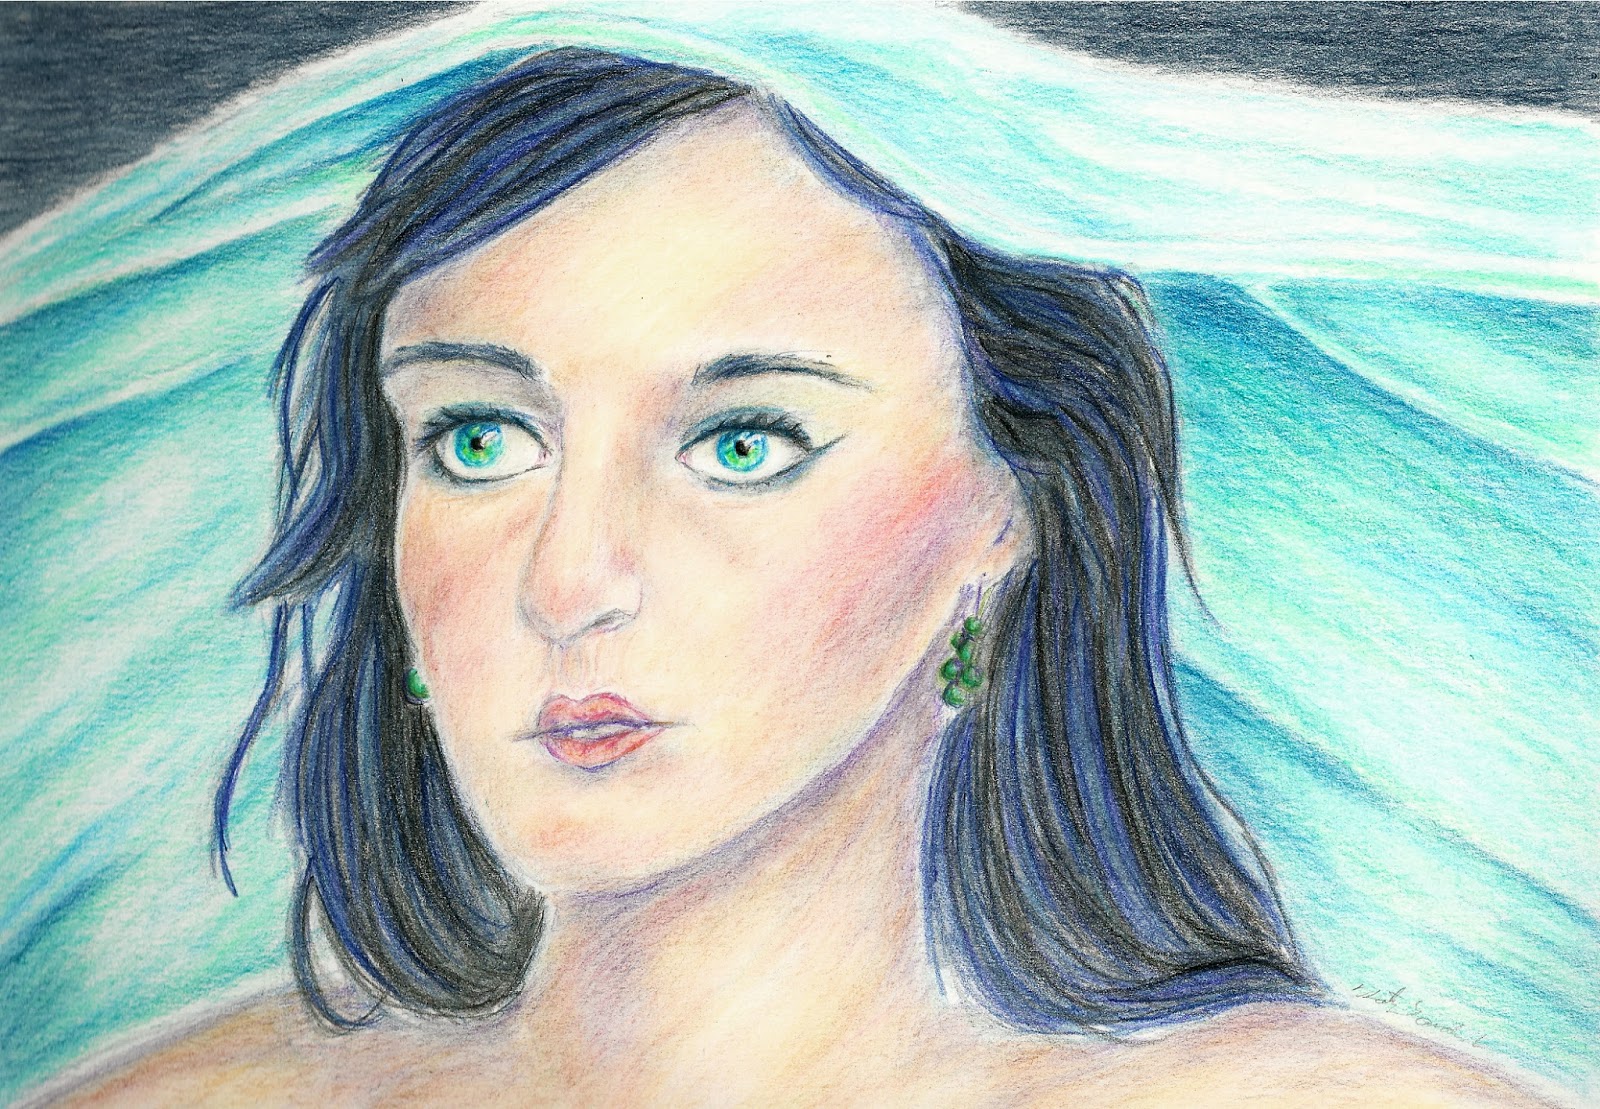
I was looking through some photos on my computer and camera, and I realized I had taken process shots of a picture I worked on last year. I had almost forgotten about them. I really do like the pictures I have taken so I though I would share the step by step process I did for this piece. This is by all means no tutorial, but to show what I did to get to the finish product.


After I lightly sketched out the picture I colored over the lines with a dark blue and started defining the shadow areas on her face

I then used the blue to define what will be the darkest parts on her hair.

I began the base color of her skin, using blues and purples for shadows.

Adding more color to her skin. Using pinks, violets, and even a little bit of green too.

Eyes and lips are finished, and I began working on the hair.

Hair is mostly finished.

The veil is done.

I darken the hair more to help give it volume, and darkened some spots on the veil to help make it pop more.

Worked on the background, and smoothed the skin out with a blending stump and it's done!

This picture was fun to do. This was my first piece using purely Faber Castell Polychromos. This is also the first colored pencil drawing I did on Strathmore Smooth Britol. Even though I really like how smooth the skin came out, I was unable to go as dark as I would have like to do to the paper not really having a tooth. It was a fun experiment though.

This piece was done for the Colored Pencil Magazine monthly challenged last year. The monthly challenges are free and open to all! It's a great way for honing your skill, and the people there are super nice. Please check it out. :)

Title: Veiled
Medium: FC Polychromos Colored Pencils
Paper: 9x12 Strathmore Smooth Bristol


Monday, February 24, 2014

Carousel Horse


I've always had a soft spot and a love for carousels. I love how whimsical and elegant the horses look in all their different poses and designs. Unfortunately, it's hard finding a carousel with really gorgeous horses. Most of the time in carnivals, the horses are cookie cutters and twins.

This is just a little tribute for carousels. I wanted to make a white horse with a caramel colored mane. For the design, I took some inspiration with the tack and gear people would have for their horses during the Middle Age(and most likely Renaissance too). Though the design may be simple, I tried to make it elegant.

Here are some progress shots I took. I wanted to take a couple more throughout the process, but the camera was crapping out on me. One day I'll save enough money to buy a better and lighter weight digital camera for myself.


Medium: Colored Pencils
Paper: Strathmore Artagain Black 6x9

Friday, December 6, 2013

Medusa


I finally managed to get Medusa done.

The story of Medusa is really sad. One of the main stories with her was that Medusa use to be a beautiful priestess for the Temple of Athena. Many men sought after her, but she choose to serve Athena. The god Poseidon found her beautiful as well, and one day entered the temple and raped Medusa. Instead of being angry with Poseidon, Athena set her fury on Medusa for disgracing her temple (it was expected of Poseidon to go after females, so that was why he was excused). In anger, Athena turned Medusa in the hideous monster that she is now. Since then, Medusa lived a solitary life away from people, because gazing upon her turns them into stone.

I did some research to find out what venomous snakes were native to the Greece area, and found about the Vipera Ammodytes (Horned Viper). I decided to reference them for Medusa's "hair".


Paper: Strathmore Toned Gray (9x12)
Medium: Colored Pencils (Faber Castell Polychromos)


Saturday, October 19, 2013

Alice in Wonderland

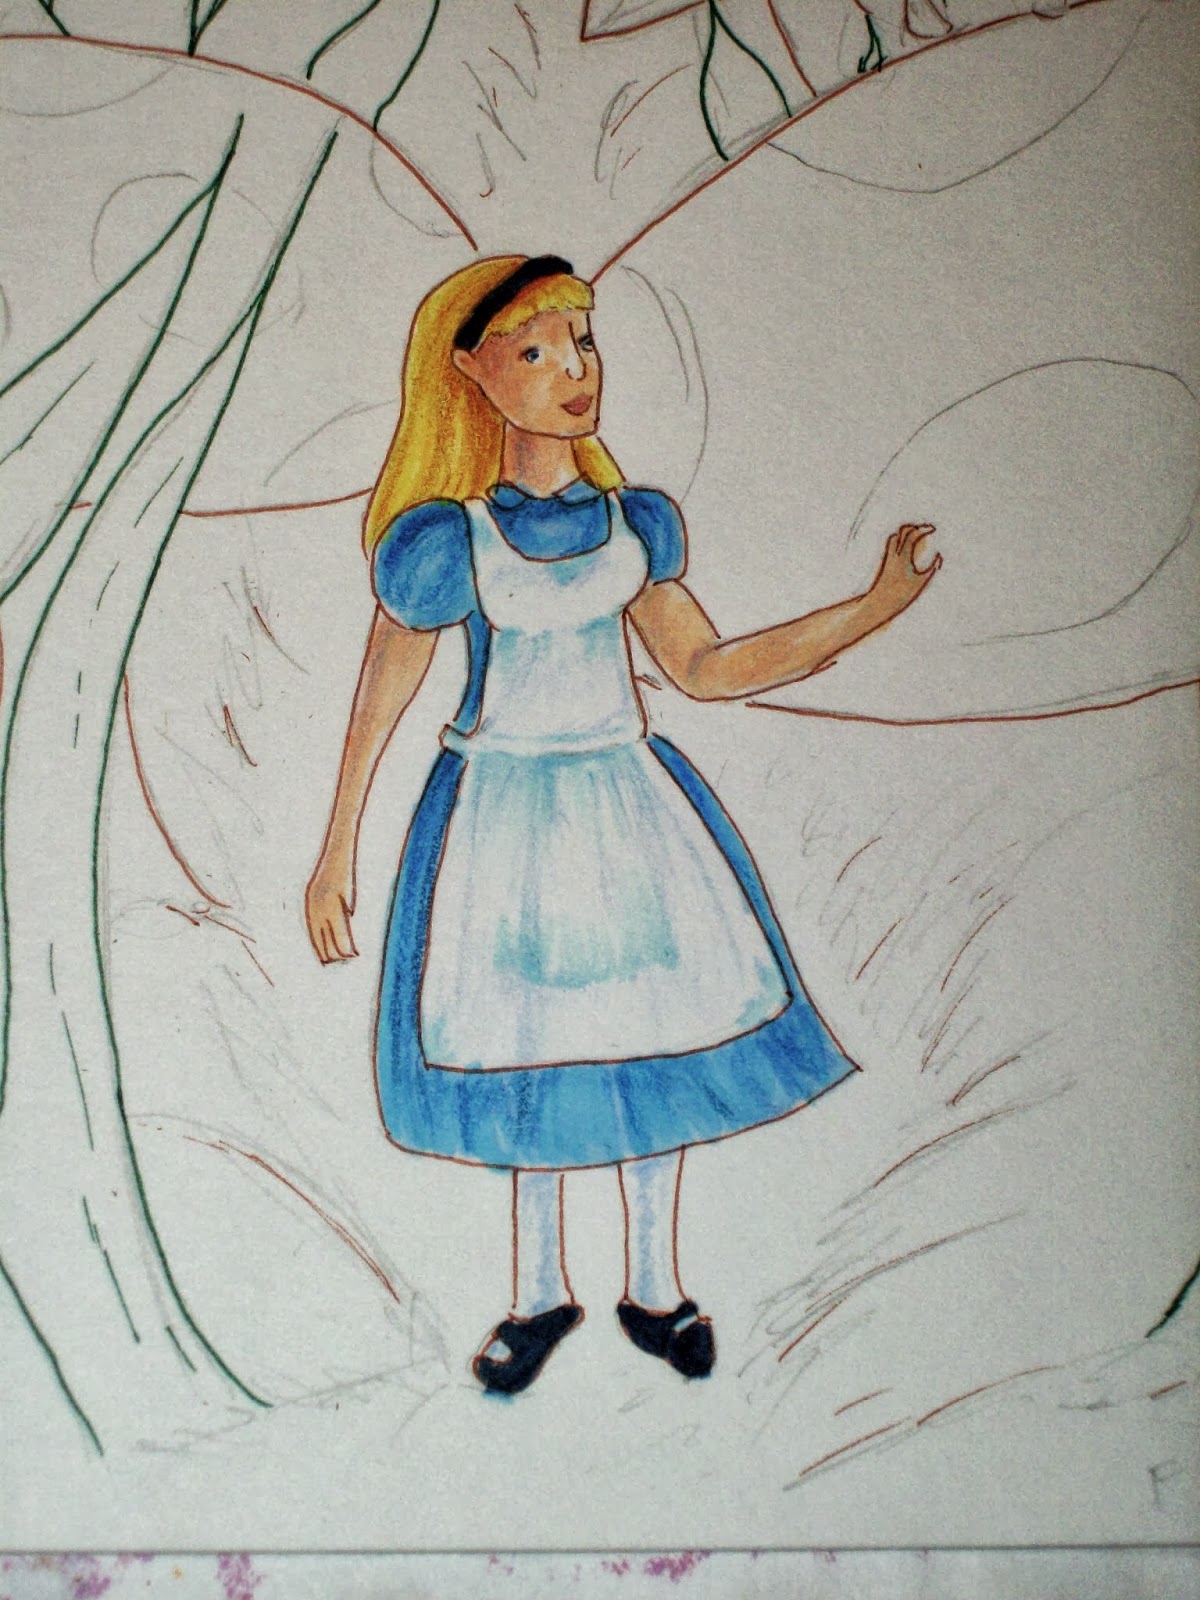
This week I went down the rabbit hole to visit some friends. I was looking through my sketchbook and found a picture of Alice that I did. So I figured it would be nice to color it. For this piece I used a combination of marker and colored pencils. Here is the finish product:


 To work on this I transferred the sketch on nice paper and used my colored copic multilinears to do the line work. The colored pens used was sepia and green. I've always found sepia to be a much more natural color when doing line art, so it's one of my often used pens.


 I started laying down the base color for Alice.


 Alice is mostly done.


Working on the mushroom.


With the base all layed down, I used colored pencils to finish it up, and add details.


Rinse and repeat.


The grass was really fun to do. The grass further back it a bit darker. I was trying to be mindful of atmospheric perspective. The further back you go, the more dull and blueish objects become. That's why I didn't ink the grass further back.


Laid down the base coat for the ground. I darkened some areas of where shadows would be.


Ground is finish!


Here are some close up shots:


That's it.

Mediums: Copic markers, Faber Castell Polychromos, a bit of white gel pen
Paper: 8.5x5.5in Strathmore Bristol Vellum

I've always found Alice to be an endearing character. What character(s) (book, movie, etc) do you find endearing?